I recently posted about Docker swarm mode; its somewhat uncertain history and future, which is strongly debated in our industry. Check out the previous post, for more on that debate and what I think is a resolution. TL;DR, I think it’s here to stay and it’s great for startups and small teams who need to build and deploy quickly. With that in mind…
Let’s deploy swarm mode.
In this example, we’ll look at how to get swarm mode up and running on bare metal servers from Equinix Metal. This is a highly-performant and cost-efficient solution. Your app(s) may not need this much power, and you may be more interested in simple multi-region or other convenience features. If that’s you, you should check out fly.io. If you want your own metal, keep reading.
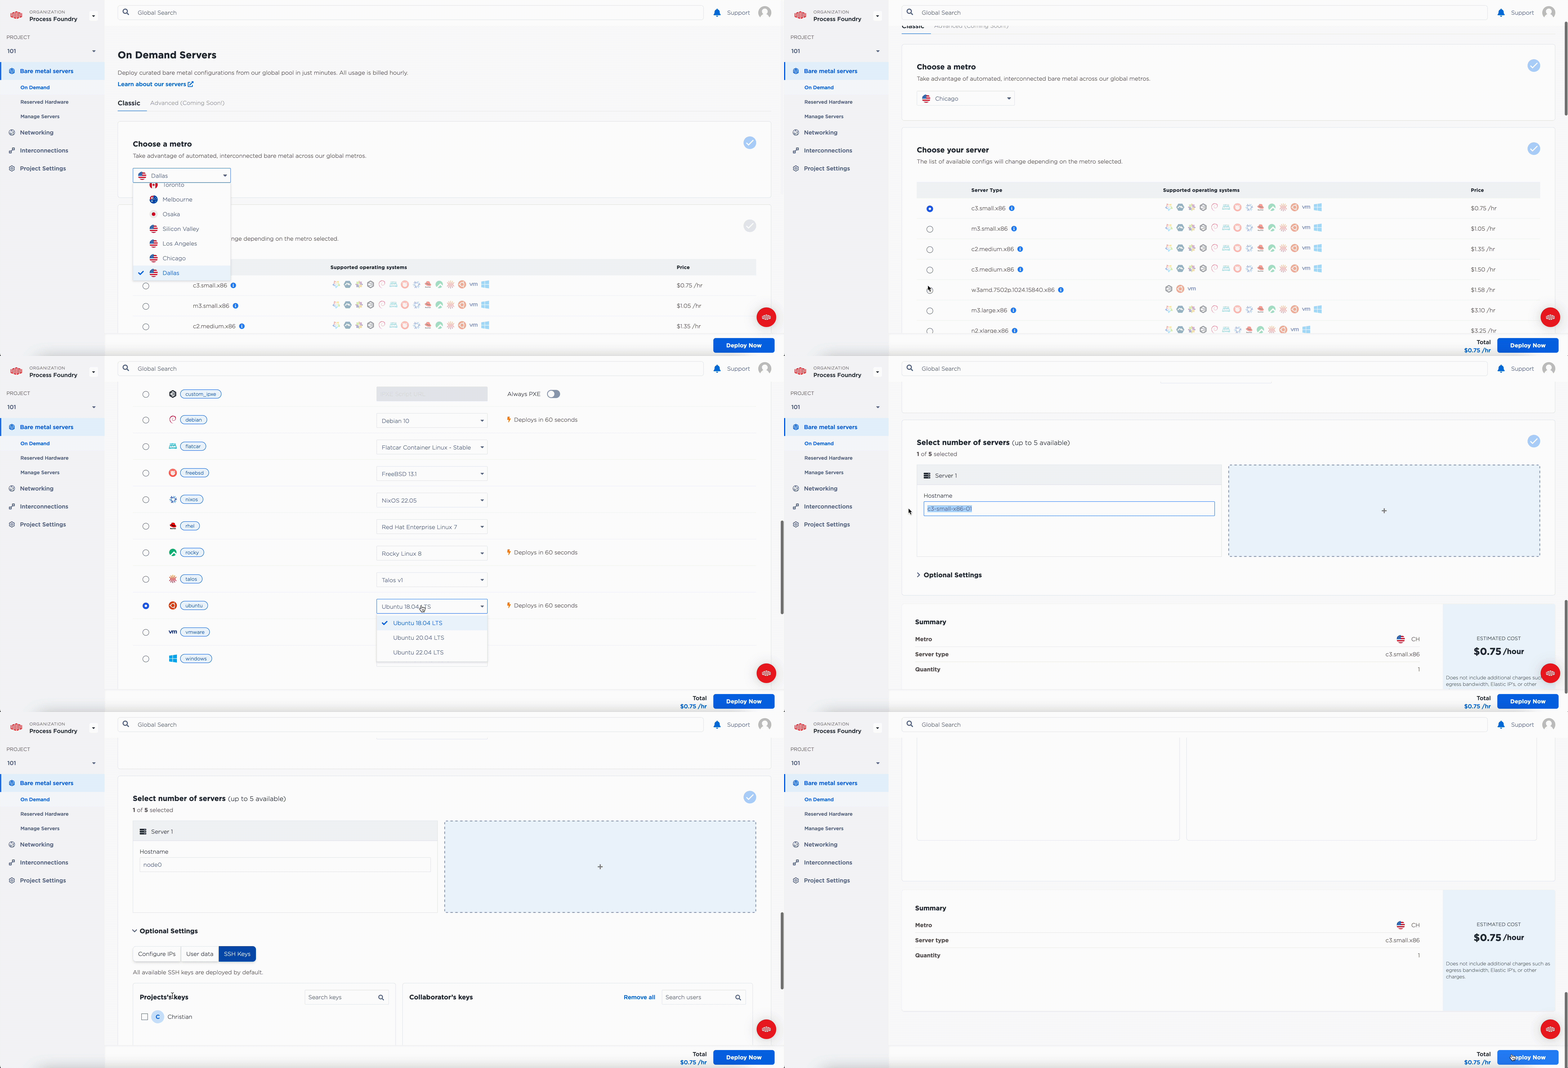
To deploy this demo, create an account with Equinix here. For this setup, I’ll be deploying a small Ubuntu server. Add an SSH key to your account in project settings, then head over to On-demand servers and create one:

Just look at all these cores and memory you get for ~$550.00/month:

By the way, I write one of these every few weeks or so. Sign-up with your email here to receive the latest, as soon as it’s posted!
Next, let’s apply a basic configuration to the server using desired state configuration. For this, I typically use the open-source version of Ansible. Here’s a playbook which configures automatic updates to run at 2am Eastern time, setup a basic firewall to protect the server (allow http, https, and ssh), and install Docker Community Edition and it’s prerequisites, ensuring it is enabled as a system service:
---
# Configures a default installation of ubuntu with several best practices
# and prerequisites for running container workloads.

  - name: "Configure servers"
    hosts: all

    tasks:
      - name: Configure automatic upgrades
        apt:
          name: unattended-upgrades
          state: present
          update_cache: yes
        become: true

      - name: Enable automatic upgrades
        lineinfile:
          path: /etc/apt/apt.conf.d/50unattended-upgrades
          regexp: '^//Unattended-Upgrade::Automatic-Reboot '
          line: 'Unattended-Upgrade::Automatic-Reboot "true";'
        become: true

      - name: Set automatic upgrade reboot time to 2am Eastern time
        lineinfile:
          path: /etc/apt/apt.conf.d/50unattended-upgrades
          regexp: '^//Unattended-Upgrade::Automatic-Reboot-Time '
          line: 'Unattended-Upgrade::Automatic-Reboot-Time "07:00";'
        become: true

      - name: Allow HTTPS in.
        become: yes
        ufw:
          rule: allow
          port: https

      - name: Allow HTTP in.
        become: yes
        ufw:
          rule: allow
          port: http

      - name: Allow ssh in.
        become: yes
        ufw:
          rule: allow
          port: ssh


      - name: Enable UFW and deny all inbound.
        become: yes
        ufw:
          state: enabled
          policy: deny
          direction: incoming

      - name: Install prerequisites
        become: true
        apt:
          name:
            - apt-transport-https
            - ca-certificates
            - curl
            - gnupg
            - lsb-release
            - unzip

      - name: Add Docker GPG key
        become: true
        apt_key:
          url: https://download.docker.com/linux/ubuntu/gpg
          state: present

      - name: Add Docker APT repository
        become: true
        apt_repository:
          repo: deb [arch=amd64] https://download.docker.com/linux/ubuntu {{ ansible_lsb.codename }} stable
          state: present

      - name: Install Docker CE
        become: true
        apt:
          name: docker-ce
          state: present
          update_cache: yes

      - name: Enable and Start Docker service
        become: true
        systemd:
          name: docker
          state: started
          enabled: yes
You can paste this in a YML file and apply it to your server like this:
ansible-playbook -i 'serverip,' -u root node.yml
Replace with your server IP. As long as you added an SSH key to the server when creating, this playbook will run and apply the config. You should see output like this:
user@computername /tmp % ansible-playbook -i 'serverip,' -u root node.yml

PLAY [Configure servers] *****************************************************************************************************************************************************

TASK [Gathering Facts] *******************************************************************************************************************************************************
ok: [serverip]

TASK [Configure automatic upgrades] ******************************************************************************************************************************************
ok: [serverip]

TASK [Enable automatic upgrades] *********************************************************************************************************************************************
changed: [serverip]

TASK [Set automatic upgrade reboot time to 2am Eastern time] *****************************************************************************************************************
changed: [serverip]

TASK [Allow HTTPS in.] *******************************************************************************************************************************************************
changed: [serverip]

TASK [Allow ssh in.] *********************************************************************************************************************************************************
changed: [serverip]

TASK [Enable UFW and deny all inbound.] **************************************************************************************************************************************
changed: [serverip]

TASK [Install prerequisites] *************************************************************************************************************************************************
changed: [serverip]

TASK [Add Docker GPG key] ****************************************************************************************************************************************************
changed: [serverip]

TASK [Add Docker APT repository] *********************************************************************************************************************************************
changed: [serverip]

TASK [Install Docker CE] *****************************************************************************************************************************************************
changed: [serverip]

TASK [Enable and Start Docker service] ***************************************************************************************************************************************
ok: [serverip]

PLAY RECAP *******************************************************************************************************************************************************************
serverip               : ok=12   changed=9    unreachable=0    failed=0    skipped=0    rescued=0    ignored=0
Next, log in to your server and setup swarm mode. You’ll likely need to specify the private IP address for the swarm mode advertise address, as you can see in this output:
root@node0:~# docker swarm init
Error response from daemon: could not choose an IP address to advertise since this system has multiple addresses on interface bond0 (86.109.3.161 and 10.69.75.129) - specify one with --advertise-addr

root@node0:~# docker swarm init --advertise-addr 10.69.75.129
Swarm initialized: current node (fjm2c2y4eiftvej76epbp8xkx) is now a manager.

To add a worker to this swarm, run the following command:

    docker swarm join --token SWMTKN-1-token 10.69.75.129:2377

To add a manager to this swarm, run 'docker swarm join-token manager' and follow the instructions.
From here, you could join other nodes in the swarm via the private address, or deploy a service. Here’s an example nginx service:
docker service create --publish 80:80 nginx
Once deployed, you should be able to hit the public IP of your server and get your service:

The next steps here would be to bring the configuration for this system into CI/CD like Gitlab or Github actions, deploy shared services, like a reverse proxy or load balancer, and set up things like monitoring and logging.
If you need help with product development and software delivery, reach out.